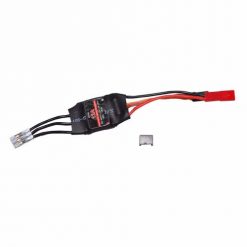
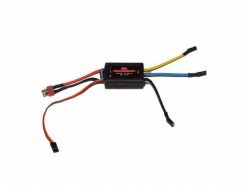
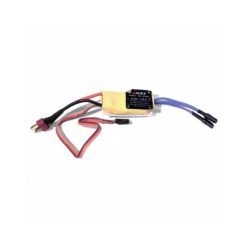
BRUSHLESS ESC 1:10 REVENGE CTS 10 – 160A – V3 NEW
Main application:
- Operation Mode – Sensor /Sensorless
- Amp – 160A
- Peak Amp – 760A
- Resistance – 0.0002ohm
- Max KV – up to 9500kv
- LiPo/Life – 2S-3S (7,4v-11,1v)
- NiMh/NiCd – 4-9 Cells (NiMh-NiCd)
- Motor limit 2S – 3,5T< on-road / 5,5T< off-road
- Motor limit 3S – 5.5T< on-road / 8,5T< off-road
- Adjustments – Programmbox (19 Programme)
- Water-resistant
- BEC – 6.0V/7.4V 3A
- Weight – 112g
Timing- /Boost function and Zero boost (blinky) mode
Measure (L/W/H): 36mm x 29mm x 20mm (without fan) / 28mm (with fan)
Weight: 98g (including 200mm cable length)
To reach the full potential of the ESC the additional V3 programming box (2110052) is highly recommended.
The following functions can be modified and saved using the program box:
Operating Mode:
“For/Brake” is suitable for competition use. In this mode you can only drive forward and brake. “for/reverse/brake ” your RC car can drive forward and backward. To drive backwards you have to stop the car completely and re-press the brake lever will release the reverse gear.
“For/reverse” is suitable for rock crawler and it has no brakes. The vehicle can also go directly from forward to reverse. Use this mode only for rock crawlers and no other cars, because the speed controller and the vehicle may be damaged.
Reverse Speed:
Here you can set with how much power the reverse gear works.
Voltage Cut-Off:
This setting is designed to protect your LiPo before undervoltage and can be adapted to individual. Please pay attention to the manufacturer’s instructions for your batteries where there is a value which must not be exceeded.
Drake Brake:
Drake Brake can also be called automatic brake. This simulates the engine brake.
(Team tip: 10% Engine brake often helps to stabilize the model on corner entry and it helps to drive consistent lap times)
Initial Brake :
Initial brake indicates how much braking force on the first press of the brake lever is available.
For example you have initial brake to 20% so you have a braking force of 20% immediately when pressing. (Team tip: use the initial brake 0% or drake brake, therefore they have a very linear braking)
Brake Strength:
This sets the maximum braking force. Usually sufficient 80% of the factory setting and you can settle down the brake obove the EPA settings on your remote control.
Brake Frequenzy:
With a lower Setting the brake force will be larger, as a higher value will gives a smoother brake force
Punch Profile
Punch Profile is your start punch and can be diversify between 1-9 :
1-3 a soft start, ideally with very little grip
4-6 a slightly stronger start, ideal for modified engines with medium grip
7-9 a very aggressive start up behavior, ideal for stock classes with high handle
BT Soft Power
Allows to fine tune the bottom end power release. With a high value ( max. 20 ) the bottom end will be very smooth. Ecspecially on slippery conditions it could help to accelerate more sensitive.
BT Soft TH Range
Is the Range to which the BT Soft Power starts and ends. If for Example 20% is set, BT Soft Power starts at 0 and ends at 20%.
Drive Frequency:
The drive frequency indicates with which frequency the controller should work. The lower the value, more power is available to them at the beginning. The higher the value, more power in the middle and closing speed range. (Team tip : the best experiences we had with 8 KHZ or zero boost mode at stock engines with 4 KHZ)
Neutral Deadband:
This shows how sensitive the controller reacts in the neutral position.
Temperature Set:
With the temperature set the switch-off of the controller can be changed, which protects against overheating.
Cost Value:
Reduces the engine braking effect. The higher the value used, the more the car rolls when the throttle is returned to neutral
Boost timing:
Boost Timing changes over the whole engine speed, the timing and so likewise helps enormous power of each to brushless motor. Please always change the settings only in small values because a too big boost timing may exert a negative impact on the efficiency of the engine and can damage this. Always keep the temperature in mind if you
change the boost timing.
Boost Timing RPM:
This indicates at which motor speed the boost timing is enabled.
Boost Timing ACC:
Acc = accelerator. This indicates at how many turns each time add 1 degree on timing.
Turbo Timing:
Turbo timing is similar to the turbo timing but this turns too at full throttle. Again, only small changes can make because too much turbo timing will damage the motor. Also, keep an eye on the temperature!
Turbo ON Slope:
Turbo slope indicates how many degrees should be added per 0.1sec off the turbo timing at full throttle.
Turbo OFF Slope:
Turbo off slope indicates the degree to which the turbo timing should shift down when full throttle is released. When set to instant, this happens immediately
Turbo Delay:
This works as a delay at full throttle. If you have the delay set to 0 so the turbo timing switches immediately at full throttle.
Reverse Rotation:
With this the rotation of the motor can be changed.
BEC Voltage:
Selection of the BEC Voltage 7,4V or 6V
Restore Default:
Here the controller can be set back to the factory settings.
Max ESC Temperature:
The Programming Box can be used the show the max ESC Temperature
Max Motor RPM:
With the help of the programming box the max reached RPM can be shown
Zero Boost “BLINKY” Mode:
The controller decreed about the increasingly upcoming „BLINKY” mode for stock classes.
The zero boost mode is indicated by a continuous flashing of the LED after switching on.
To reach this mode, the turbo timing and boost timing parameters need to program with the value 0.
| Publiseringsdato | April 2021 |
|---|---|
| Merke | ABSIMA |
| Produkt | Fartskontroller |
| Type |


